
In this article we’ll explain in details, how to use git-scm via github, in order to unleash your dev skills on our network frictionless.
TL;DR : if you already master git, go to How to use git in my workflow ? a very quick approach of this article without explanation.
THE 1 RULE
We have only 1 rule to make our life (yours and ours) easier.
Rule 1 : You never push on main branch.
As long as you follow this rule, we will all be happy.
How to start a project
To start a project versioned with the git-scm program, several options are available git init or git clone.
At Maras IT, we will start with the git clone which allows us to recover the history of the main branch (AKA the production env) from our projects.
FYI : For our examples, we will use linux command.
Clone the repo
Once you have define where to put your project, let’s say all your projects are stored localy in ~/workspace, then you can clone your project that we will call repo for the sake of this article.
You have 2 ways :
if you want to create the dir first and then clone your repo inside of it :
# in ~/workspace
mkdir repo;
cd repo;
git clone #url# .
Or you can do the same with 1 command line
# in ~/workspace
git clone #url# repo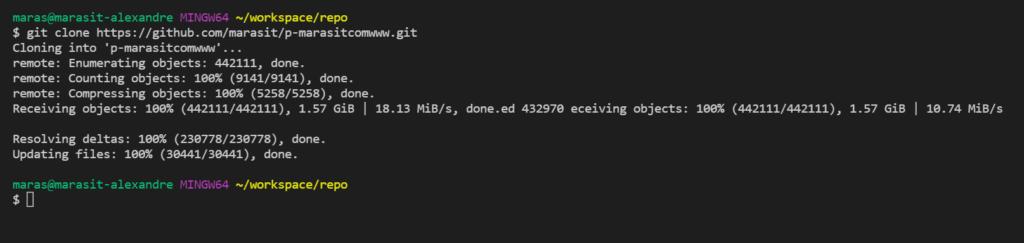
Create your branch
Usually, you should be in the main branch once inside the repo directory.
The only thing you need to do is to create your own branch, let’s say newbranch
# in ~/workspace/repo
git checkout -b newbranch
ATTENTION: for some of our clients the branch name is predefined by an issue setup in the repo.
Client might ask you to create your branch like that git checkout -b #XX-name-of-the-task
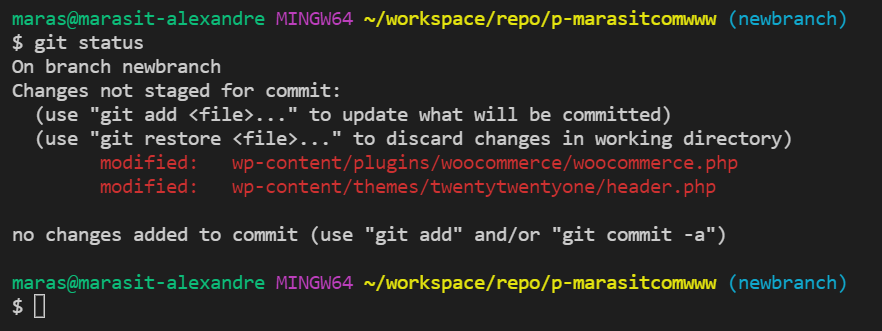
Push your modifications
After some awesome development you did, it is time to push your modifications for review.
First you can check the status of your modifications using git status
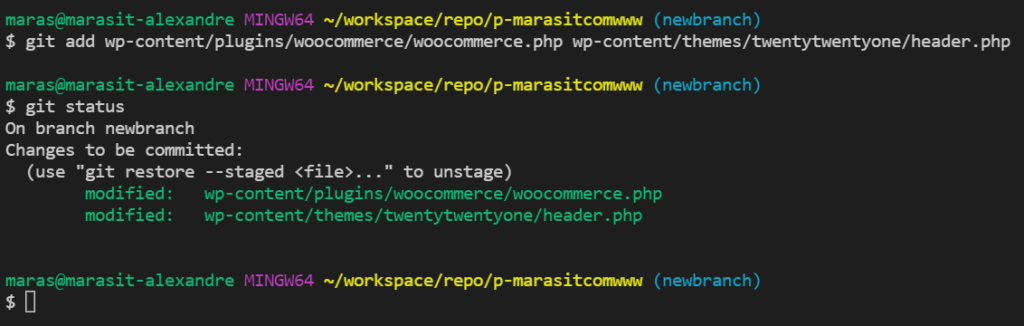
Then stage your files (indicate git-scm to take care of the added files) with git add filename1.ext [...] filename99.ext or add all of them at once with git add --all
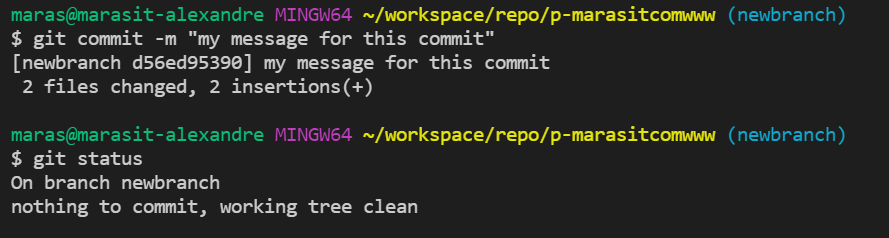
After staging your files you will need to commit them (save them in the history) with git commit -m "my message for this commit"
ATTENTION: all commits need a message and this message needs to define what the commit is for.
So, do not write “Update” but “Update plugin to add the feature” OR “Hotfix, css issues“, etc…
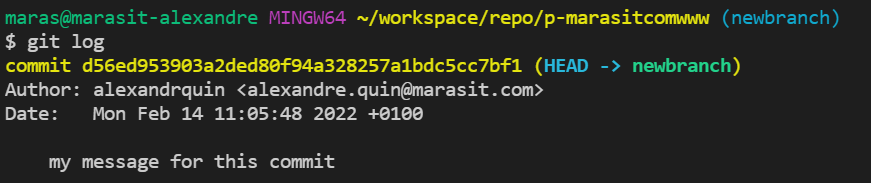
You can now see your own commit in the log with git log
Finally, you will need to push your modifications to the repo in your branch using git push origin newbranch
You have now finished your work and need the client to validate your delivery, you can send an email to your client to let them know they can test your branch. Make sure to provide your branch url in the email like https://github.com/marasit/p-marasitcomwww/tree/newbranch.
Regarding the production, this is directly handled by our service and triggered directly by the client, you have nothing to do on that topic.
We hope that article will help you follow a nice and easy development flow within our network, you can read our dev cycle process that will clarify exactly what we expect from you :).